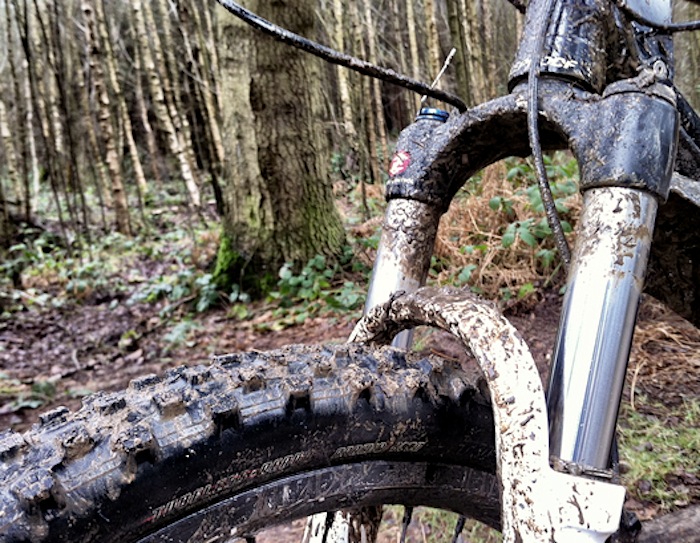
Keeping your mountain bike suspension forks clean, grit free and lubed is vitally important in prolonging the life of these essential components. Cleaning the outside of your fork will prevent the opportunity for dirt to migrate into the delicate inner workings of the suspension, while routinely checking the foam seal will alert you of any issues that need professional help.
 1. Cleaning the fork
The first step is to wash and clean the fork. It is important to do this simple procedure after every ride as it limits the opportunity for grit and dirt to get past the fork seals and into the lowers. Getting into this habit will prolong the life of your fork and help keep them running plush and smooth.
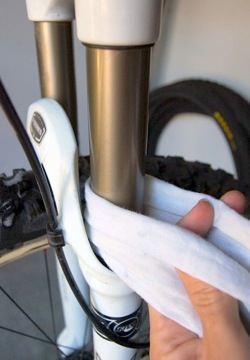
A sponge or rag and mild soapy water is all you need. Clean off most of the dirt, not forgetting to get into the space between the fork leg and bridge. Use the cloth to clean horizontally around the seal. Clean and dry any remaining residue with a clean rag.
For the novice mountain biker this may be as far as you want to go. Getting into the habit of cleaning the fork stanchion after every ride helps maintain good suspension performance by limiting the amount of dirt sneaking past the dust wiper and into the fork itself.

TIP: While keeping your fork clean definitely helps with performance and longevity, it is always best to take it to your Local Bike Shop for periodic servicing. The experts are able to examine and fix any problems easily and professionally. Most MTB suspension comes with a recommended servicing schedule based on hours ridden. Follow it and keep that bike running like new!
2. Lifting and cleaning the dust wiper
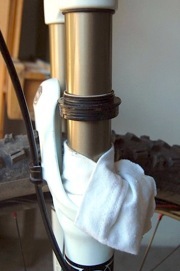
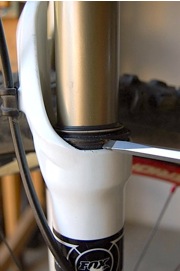 This simple process is fairly typical for a lot of fork brands out there. If unsure, consult your local service centre or manual. All that is required is a small flat head screw driver and some care. It is good to follow this procedure every 8-12 hours riding (check your manual).
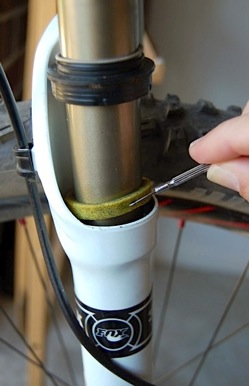
Locate the indents in the dust wiper around the top of the fork lower - this is where you can carefully prize the dust wiper off with a flat head screw driver. Once unseated, slide the dust wiper up the tube and wrap the exposed opening into the fork lower with a clean wrag. This will prevent any dirt falling in.
Clean the dust wiper thoroughly. It is now possible to get all the grit trapped against the inner tube using a soft cloth and cotton buds. Clear away any remaining dirt. You can now remove the rag covering the opening into the fork lower.
 3. Inspect the foam ring
The foam ring sits under the dust wiper and should be moist with fork oil. Its job is to lubricate the upper sections of the fork.
WARNING! The inner stanchion is a critical part of your fork. When doing any cleaning or maintenance ensure that you are very careful with any sharp tools or implements which may scratch or damage its surface.
Inspect the ring. It should be moist with fork oil, clean and intact. If it is very dirty or damaged it is probably time to get a fork service as the seals may have become compromised and you may need an oil change!
A dry, worn or damaged foam ring is a good indicator it is time for a fork service. Unless you are very confident mechanically, this should only be done by a qualified bike shop technician.
Put it back together and you're almost finished. It is now that you can apply some lubricant to the stanchion.

TIP: When lubricating the stanchion it is recommended that you use a proper fork lubricant. The downside: Lube tends to attract dust and dirt and the lubrication may actually help that stuff get past the dust wiper and into places you would rather it wasn't! The foam ring is the part that needs oil so a good method is to routinely store your bike upside down. The oil in the fork will then be able to soak into the foam ring, lubricating the essential internal components.
This is a simple maintenance procedure that anybody can do. Going further than this is beyond the scope of this article and should only be attempted by an experienced home mechanic or better yet; your Local Bike Shop.


