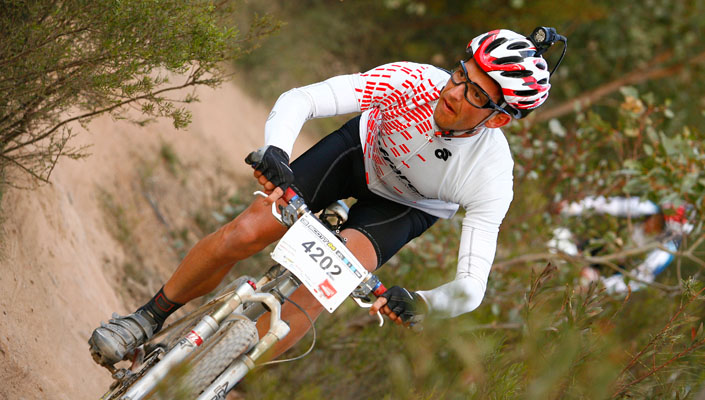
Mountain biking is a sport of instant gratification. As soon as you plant your tire onto singletrack, the feeling of freedom and speed and escape from the civilized world is profound. It is also a lot of fun! Unfortunately, for beginners it can also be a nerve racking experience, especially if your local trails are rough and full of obstacles; that foot wide track may be a little daunting at first!
There are some very simple tips to help get your eye in on the trail. Some are equipment related; others to do with skills and your approach to riding off-road for the first time, but all are easy to master and will transform your ability to ride faster. More fast = more fun!
Tires
Sounds simple enough, eh? Tires are crucial to mountain biking and can make the difference between success and failure. I am not only talking about tire choice, but also how much air you pump into them. Tread patterns vary to suit conditions, but for the beginner a middle ground is best. Look for a tire with an 'all-round' tread pattern like a Maxxis Ignitor or Schwalbe Nobby Nic. These tires mix good rolling qualities, so they're not hard work for new legs and great grip for a variety of trail conditions.
The most important element, however, is air pressure. The best tread in the world is useless if you have too much air in the tires, which is probably the biggest mistake new riders make. The result is bouncing around with zero grip, and mountain biking is all about grip!
Tire pressure depends on terrain (a rocky track will require more pressure to prevent pinch flats), but there are some simple guidelines: Firstly, if possible, keep within the recommendations on the tire sidewall - they will generally say something like 35-65psi - and adapt as you go. For most general trail riding I find a pressure of 30-35psi is just about spot-on. It provides great grip without the risk of pinch flats.

TIP 1:
Choose an all-round tire and inflate it to 30-35psi.
RELATED:: Get a Grip! Top 5 Mountain Bike Tires
Look where you're going
Look where you're going, not where you are. I see lots of new riders holding tightly onto the handlebars staring fearfully at the ground in front of them. This typically results in riding on the brakes and being one second away from toppling over.
The key here is to constantly scan only the section of trail several feet ahead of you, not immediately in front of your tire. Allow your bike to take care of any bumps, rocks or roots on the path - that's what it is designed for! Scanning the trail ahead allows you time to pick a route, or "line" in mtb speak, and prepares you for any obstacles your bike may need a hand in getting over. Once past the obstacle look up and watch the trail again.
The other benefit is looking ahead maintains speed. Riding at speed allows the bike to skip along and over many sections of track that would seem a lot more difficult to negotiate while riding slowly. Maintaining momentum is a key skill in mountain biking and can only be achieved by keeping your eyes up and forgetting about what's under your wheels.

TIP 2:
Always keep your eyes up and watching the trail ahead.
Loosen your grip and your brakes
Related to this is the "white knuckle of death grip!" Holding too tightly to the handlebars tenses your whole body (or vice versa), making bike control difficult and prevents you from smoothly handling any of the random trail elements which make mountain biking so satisfying and fun.
It is a great idea when tackling mountain biking to approach it with a relaxed attitude. Try to be mindful of how you are when riding and relax any tension in your shoulders, arms and, hands. The point of this is to be able to ride singletrack with a much looser hand grip and therefore greater control and speed.
Every time you go riding think about your grip - if you are getting all white knuckled again, relax your grip so you are holding the bars firmly, yet without the tension. This follows into braking. It is impossible to modulate the brakes and remain in control if you are clinging on for dear life!
Try to use one finger on the brakes while keeping your hand relaxed. Squeeze the brakes gently when necessary and refrain from "hauling on the anchors" except in an emergency. When cornering, it is best to adjust your speed before the corner rather than during. Braking mid-turn upsets the balance of the bike and limits your control of the manuever.

TIP 3:
Keep a firm yet relaxed grip and modulate your speed before a corner.
Use low gears, but be prepared for effort!
The undulating steep and rough terrain typical to mountain bike trails mean low gears are the norm: They prevent you from killing yourself pushing hard gears and also allow lots of traction when sitting and spinning the cranks.
That being said, there are also times when speed and momentum are your friend. This is where scanning the trail ahead is so important; it allows you to prepare for changes in gradient or obstacles which may require a bit of extra oomph! If you see something coming up, resist the urge to brake and slow, instead hold a steady momentum or increase your speed and approach the sharp rise, log, or whatever, in a large enough gear to be able to muscle over it.

TIP 4:
Low gears improve traction, but be prepared to put down power when necessary.
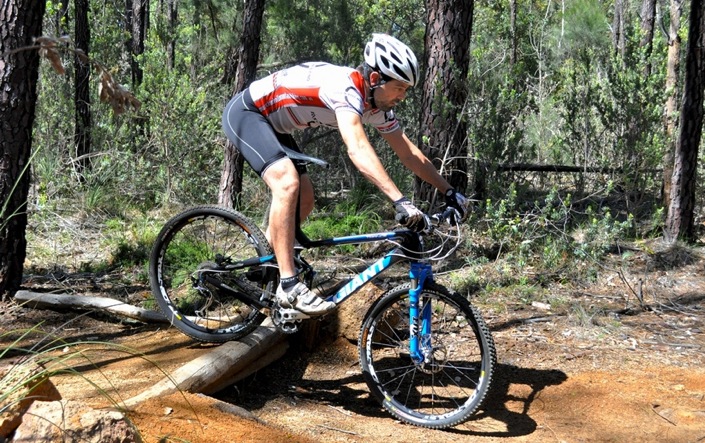
Get a good bike!
Lastly is your equipment. There is nothing more disappointing than becoming discouraged due to poor equipment (and you may not even realize). I was on the trail the other day and came across some people riding very rough, technical trails on supermarket "bike-in-a-box" bikes and all were white knuckled and struggling immensely as the terrible bikes tried to tackle the trail.
Learn this lesson early to avoid disappointment. Mountain biking is perhaps the most enjoyable sport in the world, but that fun can quickly sour if the equipment isn't up to scratch. Make sure you get yourself a quality bike from a reputable bike shop or local dealer. You don't have to spend thousands when starting out, but remember you certainly get what you pay for.
Quality bikes last and make trail riding enjoyable. Once you pay for your bike and other equipment like helmet, shoes, and a couple of accessories, you are set-up for many years of riding. You don't have to pay yearly joining fees to a soccer club or gym membership, which can be hundreds of dollars. (Mountain biking clubs are available and worthwhile, but aren't required.) Get a bike and the trails are yours!

TIP 5:
Equipment can make or break your experience. Buy a good bike from a reputable dealer.
RELATED ARTICLE:
Mountain bike skills: Choosing a line, handling gravel and drop-offs
Have you ever watched someone else mountain biking and marvel at their seemingly effortless speed and flow on the bike? Stemming from some of our MTB Skills articles, we've been asked to focus on some particular skills, mainly to do with enhancing trail flow and increasing overall riding speed on the trail... READ MORE

